DIY Kitchen Decor Gifts for 2024 Overview
Looking for the perfect gift that adds a personal touch to a loved one’s kitchen? DIY kitchen decor gifts are a fantastic way to show you care while also providing a unique and functional present. This guide offers a variety of creative and easy-to-follow ideas that will inspire your inner crafter. From personalized cutting boards to herb garden starter kits and decorative kitchen towels, we’ll explore diverse projects suitable for all skill levels. Whether you’re a seasoned DIY enthusiast or just starting, these ideas offer something special for everyone. The gifts are not only beautiful but also add warmth and personality to any kitchen space. Let’s dive into the world of DIY kitchen decor gifts and discover the joy of creating something truly memorable. The joy of gifting a handmade item is unmatched; it speaks volumes about the effort and thought put into it. These gifts are not just objects; they are expressions of love and appreciation.
Personalized Cutting Boards
A personalized cutting board is a timeless and practical gift that any home cook will appreciate. It combines functionality with a personal touch, making it a cherished item for years to come. These cutting boards are perfect for both food preparation and serving. The versatility makes them a must-have in any kitchen. Personalizing the cutting board adds a special element, transforming it from a simple kitchen tool into a sentimental keepsake. The combination of utility and sentiment is what makes this gift truly unique and memorable. These boards are not only useful but also add a touch of elegance to any kitchen. The rustic charm of a wooden cutting board is undeniable and fits seamlessly into various kitchen styles, from modern to farmhouse.
Materials Needed

To create a personalized cutting board, you’ll need a few essential materials. Start with a high-quality wooden cutting board; consider hardwoods like maple or walnut for durability and a beautiful finish. You will also need food-grade mineral oil to treat and protect the wood, ensuring its longevity. For personalization, gather your choice of materials. This could include wood-burning tools, stencils, or a laser engraver for adding names, initials, or custom designs. Other useful items include sandpaper in various grits for smoothing the wood, a ruler or measuring tape for accurate design placement, and a pencil for sketching your design before burning or engraving. Ensure that all materials are safe for food contact and that any finishes or treatments are non-toxic. This is crucial for the safety of anyone using the cutting board for food preparation.
Step-by-Step Guide
Begin by thoroughly sanding the cutting board to achieve a smooth surface. Use progressively finer sandpaper grits to remove any imperfections and prepare the wood for personalization. Next, transfer your chosen design to the board using a pencil or stencil. If you’re wood-burning, carefully trace the design with your wood-burning tool, taking your time to ensure precision. For laser engraving, follow the manufacturer’s instructions to set up and run the engraving process. Once the personalization is complete, gently sand the engraved or burned areas to smooth any rough edges. Apply food-grade mineral oil to the board, allowing it to soak in and protect the wood. Wipe off any excess oil. Repeat this process several times to fully saturate the wood, ensuring it remains in excellent condition. Regular oiling is essential to maintain the board’s appearance and prevent it from drying out and cracking.
Tips for Customization
Get creative with the personalization process to make your cutting board extra special. Consider adding the recipient’s name, initials, or a meaningful date. Incorporate decorative elements like floral patterns, simple drawings, or custom quotes. For a rustic look, explore using a wood-burning tool to add intricate details. For a more modern aesthetic, consider a sleek, engraved design. You can also apply food-safe epoxy resin to create a unique look. Another fantastic idea is to include the recipient’s favorite recipes or family crests. The key is to tailor the design to the recipient’s personality and preferences, making the cutting board a truly unique and cherished gift. The goal is to create something that is both functional and a beautiful piece of art for the kitchen.
Herb Garden Starter Kits

An herb garden starter kit is a thoughtful gift for any home cook or gardening enthusiast. It provides the convenience of fresh herbs right at their fingertips, enhancing the flavor of their culinary creations. Whether placed on a windowsill, balcony, or countertop, these kits bring a touch of nature and freshness to any kitchen. The beauty of an herb garden extends beyond its culinary benefits. It introduces a calming element of greenery. These kits are also a fun and educational project. They provide an opportunity for the recipient to learn about growing herbs and the different ways they can be used in cooking. The gift is perfect for those who enjoy cooking. It is also great for those who want to add a natural, organic touch to their kitchen. The combination of practicality, beauty, and education makes this gift a winner.
Materials Needed
Creating an herb garden starter kit requires several essential components. You’ll need small pots or containers, which can range from simple terracotta pots to decorative ceramic or upcycled containers. High-quality potting mix is essential for providing the necessary nutrients and drainage for the herbs. Select a variety of herb seeds or seedlings based on the recipient’s preferences. Popular choices include basil, mint, oregano, rosemary, and thyme. Include a small watering can or spray bottle to make caring for the herbs easier. If you wish to add a touch of elegance, incorporate wooden plant markers or labels to identify each herb. For a complete kit, consider including small garden tools like a trowel and a hand fork. To give it a final touch, you can create a personalized gift box or basket to present the kit in a stylish way. Make sure everything in the kit is easy to use and user-friendly for the recipient.
Assembly Instructions
Start by preparing the pots. If using new pots, clean them. If upcycling, ensure they are thoroughly cleaned and ready for use. Fill each pot with potting mix, leaving about an inch of space at the top. If you are using seeds, gently place a few seeds in each pot, following the seed packet instructions for depth and spacing. Lightly cover the seeds with additional potting mix and gently pat the soil. If using seedlings, carefully remove them from their containers and plant them in the prepared pots. Water the soil gently to moisten it. Label each pot with a plant marker or label, indicating the type of herb. Arrange the pots in a decorative basket or gift box to complete your kit. Include a card with basic care instructions to help the recipient get started. Make sure the assembly process is simple, clear, and easy to follow for the best gift experience.
Planting and Care Tips

Proper care is essential for the herb garden’s success. Place the herb garden in a location that receives adequate sunlight. Most herbs thrive with at least 6 hours of sunlight per day. Water the herbs regularly, ensuring the soil is consistently moist but not waterlogged. Overwatering can lead to root rot. Allow the soil to dry out slightly between waterings. Trim the herbs regularly to encourage growth and prevent them from becoming leggy. Harvest the herbs as needed for cooking, and remember to pinch off any dead or yellowing leaves. Provide a card with the specific care instructions for each herb you include. Include tips such as the best time to water, the amount of sunlight required, and any specific soil requirements. This will help the recipient to grow a thriving herb garden and enjoy fresh herbs throughout the year. Educating the recipient about herb care guarantees the longevity of your gift.
Decorative Kitchen Towels
Decorative kitchen towels are a versatile and practical gift that combines functionality with artistic flair. They add a splash of color, pattern, and personality to any kitchen. They are a small but significant detail that can instantly transform the space. These towels are used every day, making them both useful and a constant reminder of the gift-giver. The joy of receiving a beautifully designed kitchen towel is that it’s both decorative and highly functional. They are an excellent gift for anyone who loves to cook, bake, or simply enjoys a well-appointed kitchen. This gift gives you the ability to create unique and personalized designs. The possibilities are endless, from custom embroidery to unique fabric choices, making the towels truly one-of-a-kind.
Fabric Selection
Choosing the right fabric is essential for making high-quality, decorative kitchen towels. Opt for absorbent, durable fabrics that can withstand frequent use and washing. Cotton is a popular choice because it is absorbent, affordable, and comes in a wide range of colors and patterns. Linen is another excellent option. It provides a more luxurious feel and has excellent absorbency. Consider using microfiber for its superior absorption and quick-drying properties. When selecting fabrics, consider the kitchen’s existing decor to choose colors and patterns that complement the space. You can opt for playful prints, elegant solids, or sophisticated textures. Make sure the fabric is pre-washed to prevent shrinking after the towels are made. Choose fabrics that are easy to care for, such as machine-washable materials, making them convenient to use. The selection of fabrics should reflect the style of the recipient, creating a gift that is both beautiful and practical.
Sewing Tutorial

Creating your kitchen towels involves a few straightforward sewing steps. Start by cutting the fabric into the desired towel size. The size can vary based on your preferences and the intended use of the towel. Hem the edges of the fabric to prevent fraying. This can be done using a sewing machine or by hand. Fold the edges of the fabric over twice, press them with an iron, and then sew them in place. Alternatively, you can use a serger to create a neat, professional-looking edge. After hemming, you can decorate the towel with embroidery, appliques, or other embellishments. Sew these decorations onto the towel, ensuring they are securely attached. Finally, give the towel a final press with an iron to ensure it looks neat and polished. This simple tutorial makes creating beautiful kitchen towels an enjoyable and rewarding experience. Always double-check your seams and finishes to ensure durability.
Embellishment Ideas
Get creative with your embellishment techniques to make your kitchen towels stand out. Embroidery is a classic choice. It allows you to add intricate designs, monograms, or custom messages. Appliques involve sewing fabric shapes onto the towel, creating colorful and textured designs. Use fabric paint or markers to create unique patterns, drawings, or quotes on the towels. Incorporate lace, ribbons, or other decorative trims to add texture and elegance. Create personalized designs using heat transfer vinyl, which can be cut with a cutting machine and ironed onto the fabric. If you have access to a sewing machine with decorative stitches, explore different stitch patterns to add visual interest to the edges and surfaces of the towel. The key is to choose embellishments that complement the fabric and reflect the recipient’s personal style. These embellishments can elevate a simple kitchen towel into a work of art.
DIY Spice Rack
A DIY spice rack is a practical and stylish gift for anyone who loves to cook. A well-organized spice rack keeps essential herbs and spices within easy reach, making cooking easier and more enjoyable. It helps to keep the kitchen counter neat. It also can enhance the aesthetic appeal of the kitchen. This project is a great way to show thoughtfulness. It can be customized to fit the recipient’s space and spice collection perfectly. The best part about a DIY spice rack is that it provides an opportunity to design something that is both functional and beautiful. The handmade aspect shows that the gift-giver has put thought and effort into the creation. This customization ensures the spice rack fits seamlessly into the recipient’s kitchen.
Materials and Tools

To build a DIY spice rack, you’ll need some basic materials and tools. Start with wood; choose a type that is durable and attractive, such as pine, oak, or a similar hardwood. Consider the size of the rack to fit the recipient’s spice collection and kitchen space. Other materials include wood glue, screws, and nails for assembly. Sandpaper in different grits will be needed to smooth the wood. For finishing, you might consider paint, stain, or a clear sealant. Tools you will need are a saw for cutting wood, a drill and screwdriver, a measuring tape and pencil, a sander for smoothing surfaces, and a level for ensuring that the spice rack is straight and even. A safety glasses is essential for protecting your eyes. You may also need clamps to secure the pieces together while the glue dries. Ensure you have the necessary tools and supplies before beginning your project.
Building the Rack
Begin by measuring and cutting the wood pieces according to your design. The design can vary depending on the intended size and style of the rack. Ensure the cuts are precise and clean. Assemble the pieces using wood glue, screws, or nails. For added strength, use a combination of glue and screws. Clamp the pieces together while the glue dries. Once the glue is dry, sand all surfaces to remove any rough edges and prepare the wood for finishing. If you are painting or staining, apply the finish according to the manufacturer’s instructions. This might involve several coats, allowing each coat to dry completely before applying the next one. Once the finish is dry, you can add shelves and any additional features, such as a railing. Make sure the shelves are securely attached. Before giving the gift, double-check all joints and finishes to ensure the rack is sturdy and looks appealing.
Finishing Touches
Add finishing touches to enhance the functionality and appearance of your spice rack. Consider adding labels to the shelves or spice jars. Labeling makes it easier to organize and find the spices. You can use pre-printed labels, or create your own with a label maker or handwritten labels. Include hardware such as hooks or handles if the design calls for them. Consider adding a decorative backing or frame to enhance the rack’s visual appeal. Include a selection of spices as part of the gift, which provides the recipient with a starter kit to fill the spice rack. Another excellent idea is to include a personalized note or a recipe card with the recipient’s favorite dish. To complete the gift, wrap the spice rack attractively and attach a gift tag. Consider a theme to align with the kitchen’s decor. These thoughtful touches can make the spice rack an even more appreciated and enjoyable gift.
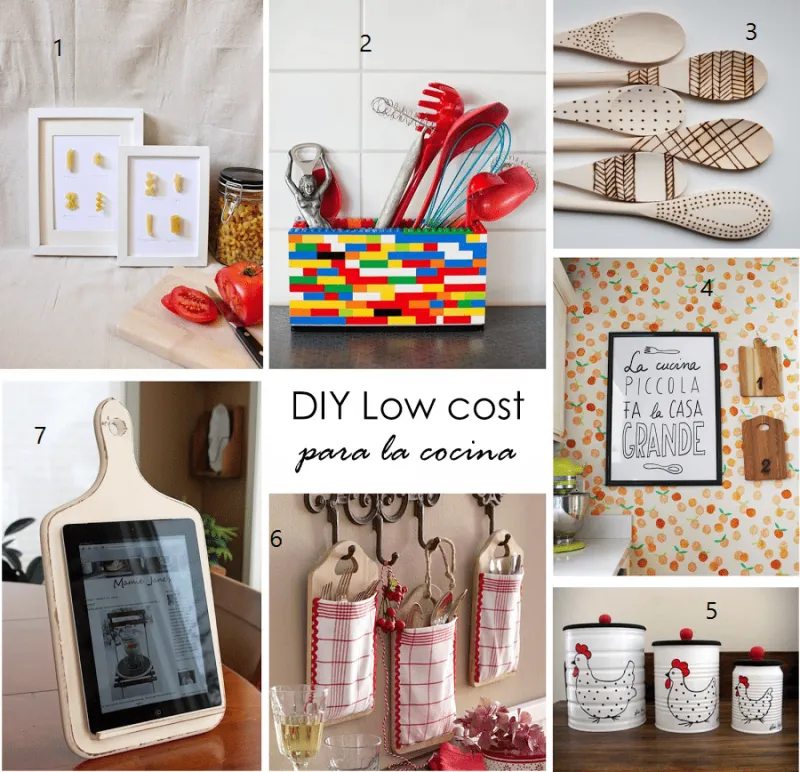
Hand-Painted Kitchen Canisters

Hand-painted kitchen canisters are a charming and personal gift that adds a touch of artistry and functionality to any kitchen. These canisters can be used to store coffee, tea, sugar, flour, or any other kitchen staples. They are a practical solution for keeping ingredients fresh. They also serve as decorative elements. The personalized nature of hand-painted canisters makes them a unique and thoughtful gift. This gift allows you to use your creativity to craft custom designs and color schemes that perfectly match the recipient’s taste and kitchen décor. This makes each set of canisters a bespoke piece of art.
Canister Preparation
Before you begin painting, proper preparation is key to achieving a smooth and lasting finish. Start with a set of ceramic, glass, or metal canisters. New canisters typically need no preparation. Clean used canisters thoroughly with soap and water to remove any grease or dirt, and ensure they are completely dry. If the canisters have a glossy surface, lightly sand them to help the paint adhere better. Apply a primer specifically designed for the material of the canisters. This will help the paint to adhere to the surface and prevent chipping or peeling. Allow the primer to dry completely according to the manufacturer’s instructions. This careful preparation step will ensure the best possible results and make the hand-painted canisters durable and beautiful. It also helps extend the life of the paint.
Painting Techniques
Choose your paint based on the canister material and your desired aesthetic. Acrylic paints are versatile and easy to work with. Ceramic paints are a good option for ceramic canisters. For glass or metal, use paints designed specifically for these surfaces. Use stencils for precise designs. You can also freehand designs using paintbrushes and fine-tip markers. Experiment with different painting techniques, such as blending, layering, or creating textured effects. Consider a theme to make the set of canisters coordinate, such as floral patterns, geometric designs, or custom monograms. After painting, allow the paint to dry completely before adding any finishing touches. Use painter’s tape to create clean lines or to protect areas you don’t want painted. This allows you to express your creativity and give a beautiful gift.
Sealing and Finishing

Once the paint has dried, it is crucial to seal the canisters to protect the design and make them dishwasher-safe. Apply a sealant specifically designed for the type of paint you used. For acrylic paints, a clear acrylic sealant is a good choice. For ceramic paints, use a sealant made for ceramics. For glass or metal canisters, use a clear sealant compatible with those surfaces. Apply multiple thin coats of sealant, allowing each coat to dry completely before applying the next. This creates a durable and protective layer. For a high-gloss finish, you can choose a glossy sealant; for a matte look, choose a matte sealant. Finally, allow the canisters to cure according to the sealant manufacturer’s instructions. This ensures that the finish is fully set. A properly sealed set of canisters will be beautiful and durable, making them a cherished gift for years to come.